


I’ve gotten quite a few emails/messages from people inquiring about the details of J’s nursery. I know that when I was in the planning stages and using Pinterest day and night, it was always so frustrating when I’d see something I loved and not be able to find any identifying information about where it could be purchased or how it was done.
Let’s get started.
The walls/Paint:
Some of my closest friends came in to town to help me paint the walls and kick start J’s nursery decorating.
Brown paint color: PARK FOUNTAIN (Valspar, Lowes)
White paint color: WEDDING BELLS (Valspar, Lowes)
We kind of winged the paint job since we honestly had no idea what we were doing, but my friend Beth took what she learned at my house through trial and error and created a fantastic tutorial on how to paint beautiful stripes. Check it out here!
We only painted one main wall in stripes and painted the other walls in Park Fountain. I think this gives the room great balance and doesn’t overwhelm the small space. The stripes actually make the room look more spacious!

Due to the layout of the room, it’s hard to get a decent shot): 

The bedding/crib details:
The first official purchase I hade for J’s nursery was the crib bedding. I scoured Craigslist for a few days and came across this entire bedding set for $45. At the time, it was retailing in stores for $300, but it looks like it’s been discontinued most places or is selling for about $150 now. It was a fabulous score for me since the bedding was in mint condition and fit perfectly with the modern/funky theme I wanted for the nursery.

I found the set online here. You may be able to find it somewhere online cheaper than this. Just type in Dwell Chocolate Dots crib bedding.
Here’s the bedding in the nursery: 
The crib is a Sorelle Gia crib that I purchased from csnbaby.com before Anna was born. It’s held up very nicely, and is super sturdy and solid. I highly recommend this line of furniture.
The dresser/changing station:
I’d say the one thing that caused me the most angst with this nursery was the dresser/changing table. The matching dresser to the crib is still in Anna’s room, so I needed to buy a new one. Since funds were limited, I wasn’t able to find anything I liked in stores or online, so I improvised and hit the local thrift shops.
I found this beauty in need of some major TLC: 
And turned it into this (with Joe’s help, of course): 

We decided to keep the original hardware pulls since they were still in great condition and looked fabulous with the paint.
Total cost: About $100 ($70 for the dresser and $30 for paint/supplies)
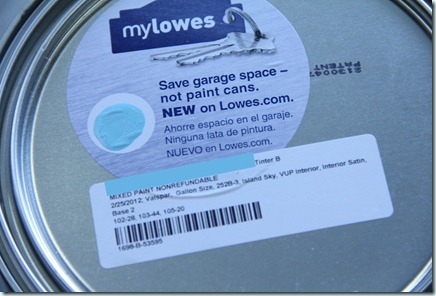
I’m not sure of the paint color name since it’s not listed on the can top, but here’s a picture of the numbers.
The curtains:
I’d have to say that other than the dresser, the chevron curtains are my favorite feature of the nursery.
Since they’re hand made by my good friend Kent, you won’t be able to find them in stores, but I purchased the fabric from HB FABRICS on Etsy. It was $8.75/yard, and I needed 7 yards of fabric. The ceilings in the nursery are 10’ high, and I wanted to hang the curtains about 10” above the top of the window and have them drape.

The artwork:
I was able to DIY the artwork in the nursery based on some images that I found on Etsy. I love being able to customize them to my exact needs and play around with the design elements a bit.

The original design is from Trendypeas on Etsy.

The original design is from Urban Tickle on Etsy.
The frames are just some old frames that I found around my house that I spray painted with Valspar Exotic Sea.

Image from unsimpleliving.wordpress.com.
The J on the top is just a last minute thing that I decided to do. I just bought a letter from Michael’s and painted it with some left over paint I had from another project (that just happened to match perfectly).

The little bunting at the bottom was made from the left over scraps that were used to create these letters:


I decided to frame the J at the very last minute and am very pleased with how it turned out. I was lucky that the J fell smack dab in the center – it was a happy accident that I couldn’t replicate if I tried.
My sweet friend Allison made each of these letters for the nursery using this as inspiration:

Instructions can be found here

My friend Allison is also making the artwork that will hang behind the crib. She hand-painted all of these canvases, and I couldn’t be more thrilled with how they turned out! Since my husband is a huge car enthusiast, I wanted to incorporate his love of muscle cars into the nursery. He already has visions of working on cars with his son (and daughter).

Lagniappe:
The orbs: 
The orb and star cluster is pretty darn amazing (especially in person).
Blue orbs are from the Martha Stewart Crafts Celebrate line – blue accordion lanterns (looks like they’re discontinued or out of stock most places). I got these from Overstock, but they only have the green set left. It was about $14 for 6.
The other lanterns (brown and orange) are from Justartifacts.com. This place had the best prices on orbs, super fast shipping and a great selection of colors.
The star lantern was purchased from Ebay. It was hard finding an aqua star, but this seller came through.
The bird mobile: 


I liked the more natural look of the twigs since the brown matches the bedding/crib. I added the mini-orbs to fill it in since I only ordered 6 birds (I would recommend 8 for this project). I got the orbs from JustArtifacts.com. The twig circle is from Michael’s.
The birds are from The Fish Box on Etsy. Melissa was wonderful to work with, and the birds turned out so beautifully! Plus, her prices are incredible!
The center of the wreath is just a regular pom tissue ball that I made from a YouTube tutorial.
The pillows: 

My friend Kent sewed these pillowcases for me and embroidered them. I couldn’t be happier with the way they turned out! The aqua dot fabric is from fabric.com. The striped fabric is from Studio 25 Fabrics on Etsy. The Chevron is remnant fabric from the curtains from HB Fabrics on Etsy.
The changing pad:
Kent also made two changing pad covers for his changing pad.

The fabric used is Kaufman Minky Cuddle Night Owl Orange/Brown from fabric.com


This is the other changing pad cover she made me. I don’t have any photos of it without Joseph on it. :)
It’s Minky Cuddle Dimple Dot Turquoise from fabric.com.
The rocking chair:
Joe’s grandmother gave us an old antique rocking chair that she purchased a while back. I love the clean lines of it and think it fits nicely in the nursery.


Aly informed me that this was actually the back side of the throw, but both sides are so beautiful that it was hard for me to tell!
The rugs: 
I found the orange rugs at Big Lots. They were $5 a piece. What a steal!

This blue rug is from Hobby Lobby for $14. I love how it is in a star shape and is the exact aqua color I need for the nursery!

The lamp:

I just found a lamp that I’d been storing in the attic and painted the base with the Valspar Exotic Sea spray paint. I didn’t have to prime or sand the base at all. It went on evenly and dried very quickly.
The old car on the dresser:

I found this at Hobby Lobby and fell in love with it immediately. I love the rustic look of it and how it ties in nicely with his nursery. I think it was about $15, but it was 40% off the day I went.
There are still a few more items that I’ll be adding over time, so check back soon. Hopefully I’ll have some bookshelves installed in the near future. I think that will be the finishing touch on the nursery!
Please let me know if you have any other questions about any of the features of the nursery.


7 comments:
What a gorgeous nursery! I love the colors and especially love the alphabet on the wall. So cute!
oh my word I LOVE his nursery! great job!!!
lovely...
you get one baby , more posts , you get one more baby cnt believe no.of posts!! how are you doing this? As a serious reader who loves your blog i wish you have more babies.. more babies = more posts and super mommy blogging powers..
Em
I love this nursery! Seriously adorable!
Such an inspiration!
Love, love, LOVE your nursery! Which design program did you use or how did you make your wall hangings of the cars and alphabet?
Love it! Hope you don't mind if I copy it a bit ;)
Thank you for posting all your information on your baby room! My Inspiration! :)
Post a Comment